Friday, October 4, 2013

1st album for baby boy

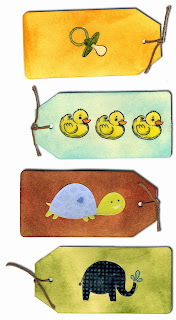
baby boy tags ducks turtle elephantbaby boy Jack Scrapbook page elephant brown blue elephant, monkey, giraffePreparing for a little one.

What talented girls I have.   Morgan had recently taken up scrapbooking to document my first grand-baby. Hasn't she done a great job on her first pages? She can't wait to fill these up with photos when our little arrives.
Check back later for more pages.

baby boy scrapbook page blue elephant monkey safari


aunt pagegrammy grandma page scrapbook album


Sunday, September 29, 2013

Halloween mini album made with Sizzix Bigz die Spooky Haunted House

Sizzix Bigz die HOUSE, SPOOKY HAUNTED # 655565


Working on using my Sizzix dies in a new way. I love how cute this turned out.
Sizzix Bigz die HOUSE, SPOOKY HAUNTED # 655565
Here is a quick quick look at my Halloween mini album made with Sizzix Bigz die HOUSE, SPOOKY HAUNTED # 655565.
Papers mostly were created with various stamps and colored card stock. Layered accents mostly from the K & Company - Spooktacular collection. Didn't have time to add voice over to video, if you have any questions, I'll be happy to answer.


Monday, March 18, 2013

Sailing Quick Page

quick page baby boy sailing page digital paper blue water red frame sail boatdigi digital paper digi page faded edges water 12x12 boy mermaid oceanI'm Sailing Away...

setting an open course for cuteness. Revisiting my old post, I realized some were in need of a life preserver. So I set forth creating examples of my designs and posting suitable products. It has become a major undertaking, but I am determined to work through them all. Hopefully you'll find it worth going back through some old posts.


This is an example of a digi paper rework. It came out so well I decided to repost it and delete the old. New baby blue works perfectly with the sailboat I have here.
 Feel free to download the sample12 x 12 quick page or create your own and come sail away with me.


Sailing QP link - right mouse click on image above
Rocket QP - free full res download page link
Son QP - - free full res download page link


Thursday, March 7, 2013

Leprechaun tag

Leprechaun tag
 It's that month for a little green. I had been thinking about creating a leprechaun, but came across this adorable guy. He is available for free download here in color and in black and white to color yourself.
With this adorable Leprechaun with Shamrock Digital Stamp I choose to make a simple tag. Basically freehand a mushroom and grass. Easy!
Printed image twice in color and glued to card stock. After thought, I should have printed it to card stock. Cut hat beard and pants and layered over first to give it depth. I know you can't see that very well, but it really makes it pop.


Tuesday, March 5, 2013

Easter Tag made from scrap paper

tim holtz tag challenge easter bunny basket

Easter Basket Tag

Yes, I admit, little pieces of paper and cardboard are difficult for me to part with. I may have a problem, but this recent Tim Holtz tag challenge put some of those scraps to good use.

Following Tim's tutorial I found I didn't have some of the product he used. No worries, Tim's are meant to inspire. And that it did! Read on for my creative solutions.
Visit Tim's tag here

Using scraps out of my "refuse to toss it" bin, these were cut using three of Tim's dies. (See bottom photo for products used)

The one I want to focus on is the shield from Sizzix Tim Holtz Regal Crest die. This will become the basket. I know it doesn't look like one now, but a simple cut and it transforms.

As you see in the photo, I used my old Sizzix Frames, Circle Combo 36-1065. It worked out perfectly, giving me a round shape for the basket and also cutting a piece I used for the basket handle., reshaping it carefully so it wasn't so round.


If you don't have this die, use something round you can trace around and cut it the old fashioned way.
Finish basket by using a white colored pencil and drawing the basket pattern.


 Tinsel twine posed a bit of a challenge for me as I didn't have alcohol ink in the color I wanted. My daughter is a collector of Sharpie pens. She doesn't know it, but I found the perfect color in her stash. It applied to the tinsel easily.

Next following Tim's instructions, I used my old heat tool to curl the end of the tinsel twine, making it look more like Easter grass.

I'm not going to get into all the details of how it was assembled, but feel free to ask any questions. 


Sunday, March 3, 2013

Tattered Florals vintage rose box


"The Tim Box" 

Tim Holtz tattered florals vintage box vintage shabby chic
shabby chic pink rose box craft

Since the Tim Holtz challenge, several ideas filled my mind. This box which I have named "Tim Box" because of all the Tim Holtz products used, was one I choose to tackle.


 Started with a small wooden box I bought from Dollar Tree and first painted it with Adirondack Acrylic Paint Dabber in Snow Cap. Once dry, I put a heave coat of Ranger, Tim Holtz Distress Crackle Paint, Picket Fence. Yes, this is was too white for this project. Adding a bit of Frayed Burlap Ranger TIm Holtz Distress Ink, once dried gave it an antique look.

  Using Ranger Archival Ink and the harlequin stamp from the Tim Holtz Visual Artistry French Market Clear Stamp set, I stamped the bottom portion of each side.
Pinks, I used Ranger Tim Holtz Distress Ink Victorian Velvet using Tim's method (except strip) of dabbing some on Inkssentials Non-Stick Craft Sheet with a little water spritzing a little water. Visit Tim's site for the how-to video. When dry, follow with bushing on edges Frayed Burlap ink.


Background paper was handmade paper (white). Use a paint brush with water to "cut" paper. Basically draw a line with water, get it very wet and pull part to keep soft edges. After you ink paper, scruck it a bit so it's not so flat, let edges curl up. Set aside to dry.


Roses, use Sizzix Tim Holtz Bigz Die Tattered Florals and polished cotton fabric, white. After inking while wet, fold flower in half, then in half again. Roll it into a cone, shaping center to resemble the center of a rose. Support it for drying, I used the hole in a ribbon spool.

 You will need 5-7 Large petals and 4-6 of the others (except pointy petals).

Assembly, I used all the same size petals for each rose and did not combine sizes.  Using a low-temp hot glue gun, choose best for center of rose and then unfold other petals, leaving them folded only in half. Glue around chosen center. Add as many of these as desired. I used 5 on large, but I think 7 would be better. Repeat for other two flowers starting with using 4 petals.


The Tim Holtz Alterations Sizzlits Decorative Strip Tattered Flower Garland was the perfect solution for leaves. This also cut from the polished cotton, distress ink was used here. I used Forest Moss and a little Frayed Burlap.

To create border around upper edge, Sizzix Sizzlits Decorative Strip Vintage Lace die by Tim Holtz was cut out of a recycled gift box and inked with Victorian Velvet and Frayed Burlap.
 Diamond were also cut from a recycled gift box using Sizzix Sizzlits Decorative Strip die Harlequin Border by Tim Holtz. Cut to size then use Ranger Archival Ink to create a distressed look and added Sizzix Tim Holtz Texture Fades, Damask.


  To frill this box up, more handmade paper was used. Sizzix Alteration Tim Holtz On the Edge Distressed Doily die worked great with this paper. Added a touch of Frayed Burlap to added a little antique look to it.
  Assemble top of box as shown and add hardware from Tim Holtz Idea-ology Findings Locket Keys and . Add roses, leaves, key and netting with hot glue.

Monday, February 25, 2013

Lunch bag rose Tim Holtz Tattered Florals die challenge


Tim Holtz Tattered Florals - tattered inspiration...

Over the weekend, I just couldn't find the creativity to work on Eri's Paris book. Normally I have a bunch of great ideas, but found myself spending more time looking at other peoples work. Then a distraction popped up in my email. Tim Holtz was having a Tattered Floral challenge.

Yes!! This is a die I have used over and over. I can do this! So I decided to create a flower in the browns, golds and reds to match her pages.


Using a paper lunch bag, I cut the the following number as seen in image.


Stamped each with Tim Holtz® Heartfelt Cling Stamp Set. Item# sb3793 using Ranger Archival Ink.

Once dried I used Ranger Distress Inks, Barn Door and Wild Honey to add a bit of color. Coating all flowers front and back with Mod Podge once dried. Ranger DIS-27157 Tim Holtz Distress Ink Pad (Google Affiliate Ad)At the tips of the pointy flower, I added Distressed crackle paint, Tarnished Brass. The tips will curl while they are drying.

Large flower and the larger of the smaller flowers, I added a heavy coat of Mod Podge and while wet, carefully burnt the edges by holding slightly over the flame of a candle. Use caution if you do this. Paper can catch fire quickly. 

Assembly, Using hot glue I started with the larger flowers not lining up the petals. The Mod Podge makes them pliable. Bend petals to desired shapes. Next take the three pointy flowers folding each in half then in half once more. Lay them down bringing all non-petal ends together (point) and glue to larger flower forming a circle and glue. In folding, some petals are now backwards, gently twist them around.

The smaller two will serve as the flower center. Take the eraser end of a pencil and place in center of each. Bring up petal edges and shape to pencil.  The smallest flower, squeeze tighter after you remove pencil to form a bud for the very center. Glue these together then glue into other flower. Bend petals for desired look.


Tuesday, January 29, 2013

Vintage Framed Cupid collage

Vintage Cupid collage


Getting into the Valentine's Day mood, I combined a couple of vintage out of copyright images for cards or pages. Leave as is or add a touch of color.
Download this free high res framed Cupid by right mouse clicking and save as.

You are welcome to add my blog link to share with others, but please do not post the image or create links directly to image. Of course you cannot resell the images/cutter files directly, but you may use them in your own art that is to be sold. For commercial use. Please contact me.

Sunday, January 27, 2013

Angels wings cutter file

Angel wings Sale

So many design uses. Can be also used on cupid for Valentines day!

Sale on Angel Wing cutter file. Now only $2. Comes as an SVG to your email. USe with your favorite cutter program. If you need another cutter fie format, let me know.

ON SALE $2

 Check out other items on sale here!
The wings above, I used Tim Holtz Distressed Ink, Dusty Concord and Ranger Stickles, purple.

You are welcome to add my blog link to share with others, but please do not post the image or create links directly to image. Of course you cannot resell the images/cutter files directly, but you may use them in your own art that is to be sold. For commercial use. Please contact me.
SVG's will be emailed to you or you will receive instructions of where of download as soon as I can process it after payment. Usually well within 4 hrs.